“I’d love to get into it, but I’m scared!”
Starting a new project can be both intimidating and exciting at the same time.
While screen printing isn’t rocket science, oftentimes I hear folks admit that they just don’t have a clue on where to begin, followed by another fear, which is wasting money.
While I do believe that success is awarded to those who take chances, some people (like me) prefer to get a top view picture of a project to assess its risks first before diving into things blindly.
If you can relate and want to know more about the cost to start screen printing, then you’ve come to the right place.
Today I’m going to flesh out everything you’ll need to start churning out prints for t-shirts and fabrics.
I’ll break down and discuss the equipment and tools that you need, along with the costs of each item, finally wrapping up with a budget you’ll need to set aside.
Once you’re done reading, you’ll be able to comfortably assess your situation and take action, which I believe, is the most important thing of all.
Highly Valuable Skill Set
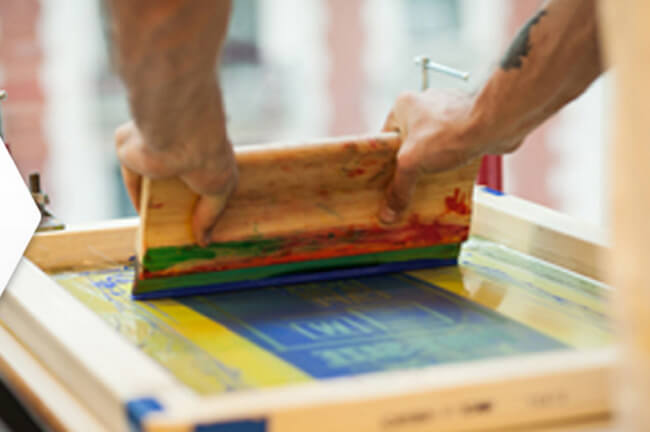
Whether you are toying with the idea of setting up a service or selling your t-shirt designs, know that screen printing is an invaluable skill to have.
Sure, there are other ways to decorate garments, but screen printing continues to dominate the marketplace despite the presence of other print methods.
Heat transfers, dye sublimation and direct-to-garment printing (DTG) are all equally reliable, but ask anyone and they’ll hands down choose screen printing as the preferred print technique, with good reasons why.
If you’re after high quality, durable prints that will last a long time, screen printing is the way to go.
With careful ink selection, you’ll be able to produce colors that are more pronounced, textured and vibrant than any other method.
Not only that, it’s a cost-effective solution for both getting started – not having to purchase expensive equipment, or to scale a production – price drops significantly when print numbers go up.
Nevertheless, screen printing isn’t something that you can pick up in a day.
It may be simple enough to produce a single colored print after a few good tries, but moving into multi colors is rather process and technique heavy that will take time to figure out.
Don’t be surprised to find yourself glued to Youtube or going around in circles trying to gain the needed experience.
Fortunately, once you master the essentials, it can no doubt lead you to rewarding results, not to mention opportunities that are highly lucrative.
Screen Printing equipment and how much it all cost
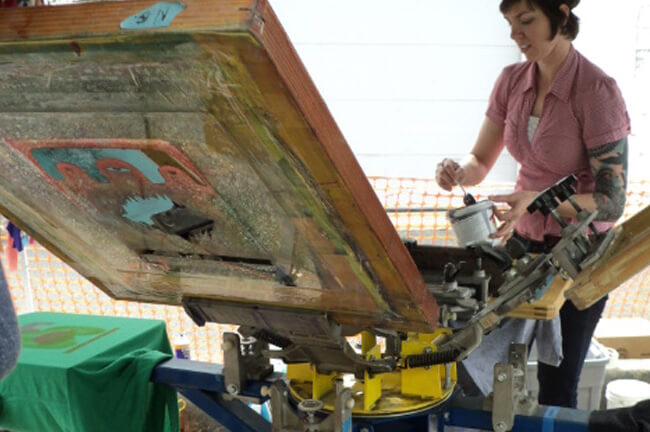
Screen printing at its core, is just a process of transferring a printed design onto a flat surface using a screen, ink and squeegee.
I won’t go into detail of what this entails, for that you can check out my complete screen printing tutorial.
But essentially, the process is broken down into three parts. I’ll categorize it as:
- pre – printing
- printing
- post – printing
Each part requires different equipment and materials.
Keep in mind that the quality of your print may depend on the quality of the things you purchase so when in doubt, it’s best to invest in decent quality stuff especially when you are starting out.
That said, to keep things in the spirit of DIY-ness, I’ll lay out cost effective options that you can still use to achieve the best results.
Before we move on, please allocate some space for this project. Having a proper work area should be the first thing on your list.
You can convert a spare room into a work room/ dark room especially to store your screens. If you don’t have a spare room, do what I did and transform your bedroom into one.
Make sure to cover the windows with cloth or paper and seal off any remaining cracks that allow sunlight to creep in.
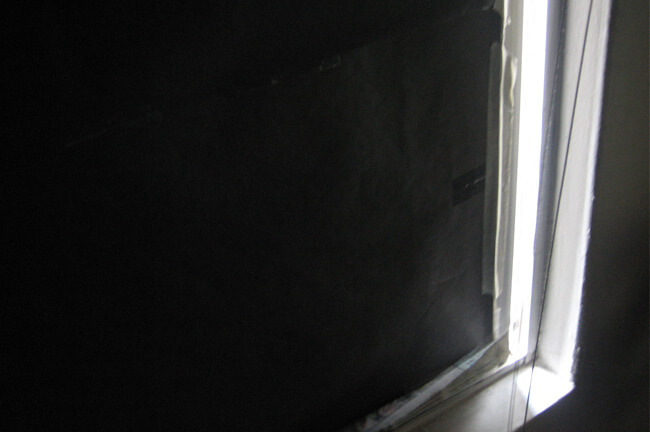
As we’ll be working with emulsion – a light sensitive material, it’s crucial to be in a UV free environment. You can also install some UV safe lighting (I’ll show you which to get later) at the same time.
Now let’s get started!
Pre-Printing equipment and costs
1. Design software
No need to get fancy here. Any decent desktop or laptop that is able to run a design program will suffice.
My personal choice would be CorelDraw or Adobe Photoshop or Illustrator. CorelDraw is roughly $600 for a one-time fee, while Adobe’s subscription model might give you more value at $10-50 per month depending on which program you choose.
I wrote an in-depth article about the Free and Paid graphics software you can get started with. Absolutely read if you haven’t picked one out yet.
Related: Why You Should Use Vectors over Bitmap in Screen Printing
2. Printer
You can use any ink-jet or laser printer to start, all you need to know is which settings will produce the darkest/opaque prints that will totally block out UV light when you expose your screens.
I started with an old Epson ink jet printer and later upgraded to a Canon Pixma for about $100, both of which worked well.
3. Transparency films or vellum
Both of these are thin sheets that you print on to produce a stencil of your artwork or graphics.
Before printing your transparency, make sure the right film goes into the correct printer. Ink-jet and laser printers function differently – laser printers use heat to infuse ink onto the paper, so if you run inkjet transparencies through a laser printer, this might cause the transparencies to warp.
Always use laser printer transparencies or vellum in laser printers and inkjet transparencies in inkjet printers. A pack of 30 Inkjet Transparency sheets will run you $25, while 100 sheets of laser transparencies and 50 sheets of laser vellum paper are both cheaper at $14 each.
4. Screen printing frames and screens
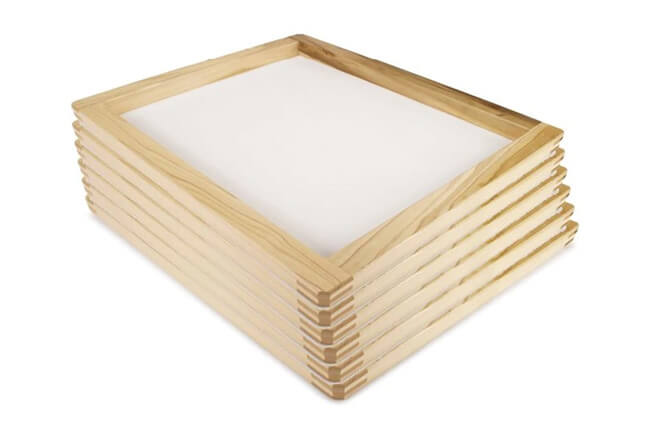
You can either make these yourself or buy them ready-made. I would suggest custom made only if you have an odd size or are planning for something other than the usual printing.
Otherwise buying ready made is one thing less to think about. Ready made screens will set you back roughly $15 for 3 pieces of wooden frames and $70 for 3 aluminum ones.
5. Emulsion
This light-sensitive liquid hardens when exposed to UV light to create a stencil. There are several types of emulsion and is determined based on the ink type you use either water-based of plastisol ink. Emulsion for water-based ink cost around $30, while emulsion for plastisol is around $25. I’ve answered several common questions on emulsions here.
6. Emulsion Scoop coater
Use this to coat your screens evenly with emulsion. Sharp edge scoop coaters are meant for higher mesh counts while rounded edges are used on lower mesh counts. Or you can get this dual edged scoop coater 12 inch for $16 for all types of mesh counts.
7. Drying racks
Use them to lay your emulsion-coated screens horizontally while the emulsion dries. Optional for starting out, but it’s so convenient to have. You can purchase a screen drying rack for $70 or, better yet, build your own.
8. Exposure unit
To produce a stencil for your artwork, you need to expose the emulsion coated screen to UV light. The light generated from the exposure unit solidifies the emulsion, allowing ink to pass through areas which are not blocked out by emulsion.
Exposure units come in different capacities. A professional exposure unit will set you back $200, while I managed to build one using a 500W halogen tube for under $50, which had enough UV output to expose an A4 sized image.
Optional
Closet or Box
Earlier I mentioned that a dark room is necessary for working with emulsion. If you don’t have a spare room to convert, you can store and dry your emulsion coated screens in a closet or inside a box. Just make sure no stray sunlight or reflected sunlight will expose dry emulsion.
UV-safe light bulbs
Ideal for working in a dark room. I usually get UV safe, yellow light bulbs for under $12. Whatever you do, please do not use black light as they emit UV rays and will expose your screens.
T-square
Great for lining up films when burning screens. When screen printing multi-color images, it’s essential to have all your color layers burned into the same spot on each screen for easy registration. This is where the t-square comes into play. Place the plastic edge of the t-square flush against the screen, and then place the film to where the registration marks line up with the aluminum edge of the t-square. This will make it very easy for you to burn each film into the same spot on each screen! Great tool for about $20.
Screen Printing Equipment and costs
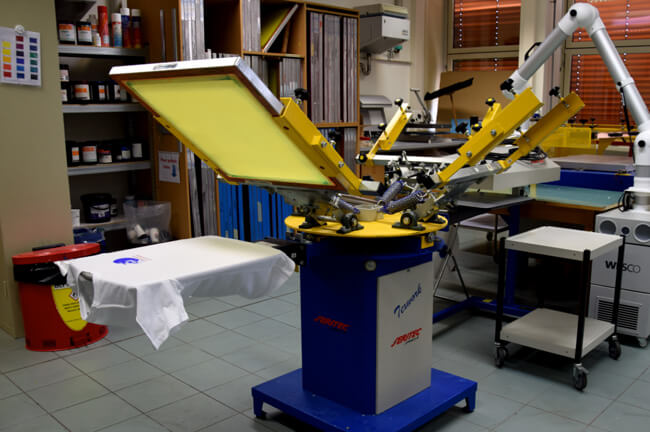
1. Screen printing Press
While you can easily screen print with just a mesh screen and a squeegee, a press is recommended to hold the frame in place – even if you’re printing just one color.
You can start with a manual one station press for $100 or build one yourself, using some clamps for $20. When you’re ready to take things to the next level, invest in a four station press for about $200 for multi colored prints. If you’re a DIY-er, check out this plans for a 4-color 1-station press.
2. Inks
You have two common types of ink in screen printing – plastisol and water-based. Plastisol seems to be the one most often used by beginners because it’s easier to handle, although I started with water-based and did just fine. You can read more about both inks, their pros and cons in this article I wrote.
A nice starter set of plastisol inks will run you about $120, while some water-based inks from Jacquard will be under $30. There are also eco-friendly inks in the market but they cost a bit more.
3. Squeegees and squeegee holder
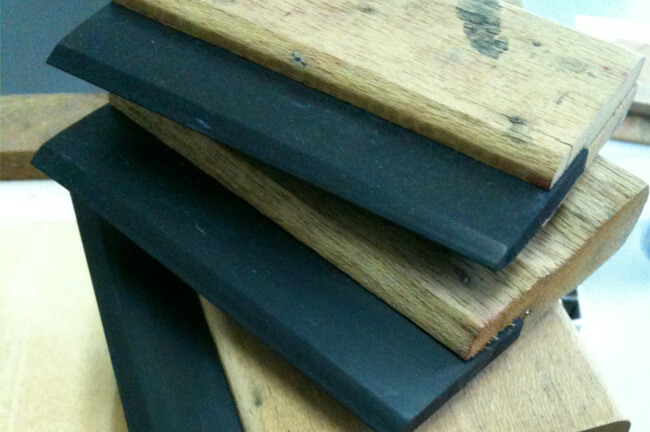
A piece of rubber blade that’s used to push ink through the mesh onto the t-shirt, a squeegee is often an overlooked piece of equipment but is such a crucial part of the process. I wrote why you shouldn’t just get any squeegee.
Start with an all-rounder blade like a 70/75 durometer. A pack of 2 will cost $15. While you’re at it, do yourself a favor and get a squeegee holder for $25 when you need to set your squeegee down somewhere during printing.
4. Blanks
Obviously you will need t-shirts blanks and fabric. You can create an account with wholesale suppliers or you could just run down to your local Walmart or check out Amazon and get yourself a pack of 12 Gildans for $30 to start with.
READ: Check out this post first before ordering from wholesale suppliers
5. Test pellons
The cheapest option to test out your prints before committing to the actual product. These pellons will mimic ink on t-shirts and fabrics so printers often use them to show clients or prospective customers how a print will appear as a demonstration. They usually come in 15 inch x 15 inch and costs around $20 for 50 pieces. No brainer, indeed.
6. Spray adhesive
For about $10, it’s good for holding down and securing t-shirts on platens.
7. Masking tape or screen printing tape
Multipurpose adhesive tape that you can use to block out pinholes or open areas in the mesh. Get something that is ink and solvent resistant and can be removed easily without leaving residue, like this one for $12.
8. Flash cure unit
Especially needed when doing multiple colored prints. To “flash cure” means to partially cure or “gel” the inks in between prints so you can add one color after or on top of another e.g. white under-base.

Some printers I know use a flash cure unit to fully cure their t-shirts. The cheapest flash cure unit runs about $250 but if you want something the pros use, prepare to spend into the thousands.
Alternatively, I’ve used my 500W halogen lamp exposure unit I mentioned above to flash cure my t-shirts.
If you are on a budget (who isn’t) maybe give that a go. But make sure you don’t overheat and accidentally cure your inks.
Post-Press Equipment and costs
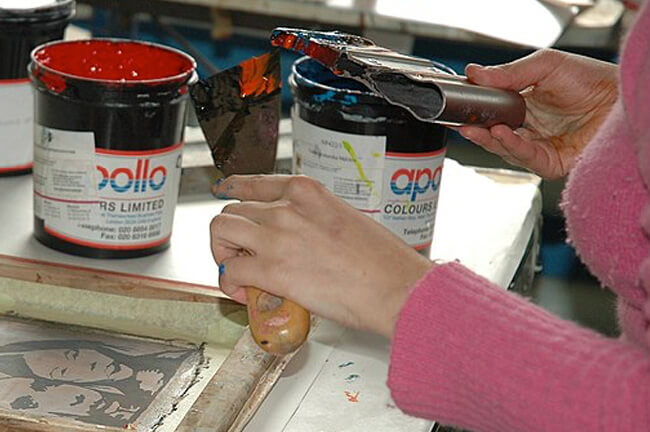
1. Curing element
Curing is the crucial final step in the screen printing process. Inks should be properly heat cured so it sets nicely into the garment. Failing to do so will result in the design cracking and fading.
There are several ways to go about curing your t-shirts including using a flash cure unit, but if that’s too expensive, I’ve gone into detail how you can do this according to your budget.
To start things off at home or even in a semi-professional setting, I suggest using a combo of heat gun and temperature gun to get the job done. Decent ones go for about $30 each.
2. Degreaser
An important step to clean off traces of dirt, oil and grease on the screen, especially before coating the next stencil. Proper degreasing will prevent the emulsion from separating and may cause premature screen breakdown.
Many DIY printers I know use dishwashing liquid e.g. Dawn or a multi purpose cleaner like Simple Green. But if you want something specific, go with Franmar’s D-grease which will run you $14 for a quart.
3. Dehazer
For removing ghost images and haze when reclaiming screens. A good dehazer will save you money in the long run with longer usability of screens. For an eco-friendly dehazer, Franmar’s D-haze will run you $17 per quart.
4. Emulsion remover
Designed to reclaim screens by removing photopolymer, dual cure and diazo based emulsions and capillary films. Depending on the brand of emulsion, the same company will have an emulsion remover as well so make sure to check this with your supplier.
Emulsion remover will typically run you anywhere from $8-12 for an 8 ounce bottle, or checkout something that can work with any emulsion like Franmar’s Strip-E-Doo Emulsion Remover for about $40.
5. Washout booth
Not only do you need an area to wash and clean your brushes, ink pans, spatulas, etc. you’ll need a place to rinse, soak, clean your screens after each printing session.
Commercial washout booths can run you up to $1000 or you can build one yourself for $100.
Alternatively, I started hosing down my screens into a big tub using a regular garden pipe with a pressure nozzle for about $20.
Dip Tank (optional)
Especially helpful to clean your screens, this is the printer’s ideal method for screen reclaiming. It’s fast, space saving and reduces chemical wastage.
However, a dip tank can run you between $200-400 depending on size. For the value it provides, that’s a lot to fork out when you’re starting out.
Cost To Start Screen Printing Checklist
So here’s a summary of everything that I’ve laid out above in each section. There are 4 columns as you can see below which include the minimum cost to start screen printing and the maximum.
| Pre-Printing Equipment | Cost | Minimum Cost | Maximum Cost |
| Design software | |||
| • CorelDraw (one-time) | $600 | $600 | |
| • Adobe subscription (monthly) | $50 | $50 | |
| Printer Canon PIXMA (inkjet) | $100 | $100 | $100 |
| Transparency films or Vellum | |||
| • Inkjet Transparency Paper (30 Pack) | $25 | $25 | $25 |
| • Laser Jet Printers (100 Sheets) | $14 | ||
| • Laser Vellum (50 Sheets) | $14 | ||
| Screen printing Frames and Screens | |||
| • Natural Wood Frames (3 pack) | $13 | $13 | |
| • Aluminum Frames (3 pack) | $70 | $70 | |
| Emulsion | |||
| • Speedball (Water-based) | $28 | ||
| • Ulano (Plastisol) (quart) | $23 | $23 | $23 |
| Emulsion Scoop coater – 12 inch | $16 | $16 | $16 |
| Drying racks | $70 | $70 | $70 |
| Exposure unit | |||
| • Commercial unit | $200 | $200 | |
| • DIY Method (incl. 500W lamp) | $50 | $50 | |
| Closet or Box (Optional) | FREE | FREE | FREE |
| UV-safe light bulbs (pack of 2) | $12 | $12 | $12 |
| T-square (Optional) | $20 | $20 | |
| Printing Equipment | Cost | Minimum Cost | Maximum Cost |
| Screen printing Press | |||
| • 1-color 1-station | $100 | $100 | |
| • DIY 1 color (incl. $22 clamps) | $40 | $40 | |
| • 4-color 1-station | $200 | $200 | |
| • DIY 4 color – 1 station | $100 | $100 | |
| Inks | |||
| • Plastisol inks | $120 | $120 | $120 |
| • Water-based inks | $30 | ||
| Squeegee (2 pack) | $15 | $15 | $15 |
| Squeegee holder | $25 | $25 | $25 |
| Gildan T-shirts (12 Pack) | $30 | $30 | $30 |
| Test pellons (50 pieces) | $20 | $20 | $20 |
| Spray adhesive | $11 | $11 | $11 |
| Block-out tape/ screen printing tape | $12 | $12 | $12 |
| Flash cure unit | |||
| • 16”x16” 1600W Flash Dryer | $250 | $250 | |
| • DIY 500W halogen lamp exposure unit | $30 | $30 | |
| Post-Press Equipment | Cost | Minimum Cost | Maximum Cost |
| Curing element | |||
| • heat gun | $30 | $30 | $30 |
| • temperature gun | $25 | $25 | $25 |
| Degreaser (quart) | $14 | $14 | $14 |
| Dehazer (quart) | $17 | $17 | $17 |
| Emulsion remover (8 ounce) | $10 | $10 | $10 |
| Washout booth | |||
| • Commercial | $800 | $800 | |
| • DIY washout booth | $100 | ||
| • Pressure hose nozzle | $20 | $20 | |
| Dip Tank (optional) | $200 | $200 | |
| Sub-total | $858 | $3,015 | |
| Miscellaneous | +20% | +20% | |
| Total | $1,030 | $3,618 |
If you want to make changes according to your budget, you can download the Checklist for FREE
I hope this gives you a clearer idea of the costs involved.
Obviously this isn’t an exhaustive list and that’s why I’ve added the additional 20% for miscellaneous items you need to buy.
Other things to take into consideration for how I came up with the total:
- Calculated based on an Inkjet printer. If you have a laser printer, then you would adjust it by purchasing laser transparencies or vellum instead.
- I’m going based on plastisol inks. In this scenario, the emulsion selection is different. For water-based, you should adjust accordingly.
- I’ve added all Optional items into the Maximum Cost column
- Both Minimum and Maximum totals are based on a 1-color screen printing press. Adjust accordingly if you want to use a 4-color press.
- I added an Adobe subscription to the Minimum costs. Remember that this is a monthly recurring fee. I highly recommend a Vector program if you decide to get into screen printing. I go into detail the reasons why.
As you can see, the cost to start screen printing boils down to your individual goals, existing tools and most importantly, skill levels.
Some of you might be quite handy, so taking on the DIY route is possible. For some, not so much. You know yourself.
Also consider your ultimate goal.
I know many people who start out with the intention of pursuing screen printing, buying the best equipment, taking courses, etc, only to abandon it after a few attempts.
Surprisingly, some of them happen to be long time customers of mine.
Unless you’ve done some basic screen printing and want to commit to this and really get involved, go with the options from the minimum costs column.
Should you get screen printing “starter kits” instead?
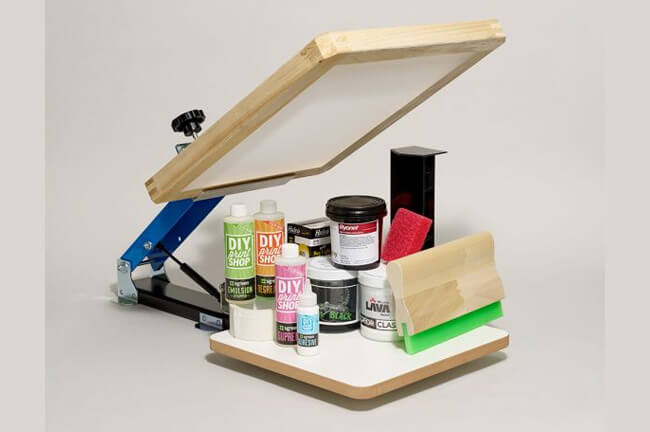
Some online companies like Ryonet sell “starter kits” which include everything you need to start screen printing.
A basic 1-color table press cost under $300 and I’ve heard good things from newcomers.
They also include tutorials and from what I’ve seen, do a good job welcoming beginners to the craft. The single color press is enough to learn the basics and even master single colored prints.
That said, some people I’ve spoken with outgrew the kit pretty fast.
And in the end, they had to purchase additional items like ink (colors), larger frames, squeegees and degreaser to name a few.
They eventually spent more money because they needed more things to go beyond the basics – which is what these kits are intended for.
So if you’re a hobbyist looking to wet your feet, these starter kits are a good start, but I would suggest finding used ones.
Check the local classifieds like Craigslist, Offerup, Facebook Marketplace or even eBay, I’m pretty sure someone is selling them along with the stuff it came along with.
However, if you’re looking at screen printing beyond a single color or hobby aspect, I suggest gathering and sourcing each item individually as you learn more about the materials itself, the tools of the trade and the vast options available.
Read more:
Start a Screen Printing Business: 33 Tips From Actual Owners
Can You Really Make $250K/year Screen Printing T-shirts?
Do you have a full picture now?
I’m hoping this article has helped you identify the cost to start screen printing, but most importantly, a game plan to move forward.
I find that too often, people are so eager to start a new project that they end up skipping some very important considerations.
In any case, take your time and always make sure to enjoy the process whatever the outcome may be.
