While I have tried my best to break down how the screen printing process works, some will still find it difficult to achieve what they want. Sure it’s daunting, but the rewards I assure you, are great! I’m hoping some of you will give it a try at least.
And to help you along in your journey, it’ll be extremely beneficial if you started screen printing with a screen printing press! Not only will it level up your art projects, but I guarantee it will also speed up your learning process.
Today, I’m going to show you how to build your very own DIY screen printing press, which also means you do not have any more excuses not to be using one!
3 benefits of a screen printing press
Many beginners may think that since they’re only starting out, a press isn’t required, especially for the simple prints they’re doing. Well if you are one of them, you couldn’t be further from the truth.
The screen printing concept might be simple to comprehend, but I assure you that in practice, it’s an entirely different animal, which is why I recommend everyone, especially beginners, to learn screen printing with the aid of a screen printing press.
Here are a few key reasons why you should consider using one:
- Stability: Whenever you pull or push your squeegee during printing, it’s important to keep your frame from moving around as you pass ink to the garment. Having a diy screen printing press will help lock the frame down and make sure your print doesn’t smudge, distort, or get knocked out of balance, leaving you with a crappy outcome.
- Consistency: Printing with both hands is better than one, this is a no-brainer. Having the ability to use both hands will let you gauge and control the ink flow and pressure with more accuracy. Plus, you won’t get too tired if and when printing multiple t-shirts.
- Learning: Like i mentioned earlier, having a press by your side will enable you to produce more successful prints and in turn motivate you to continue. Imagine seeing your artwork come to life in full color! This will inevitably push you to try harder and prompt you to get into multi-colored prints. Which in my opinion, is where the fun really begins 🙂
For those of you who want to keep costs down, building a diy screen printing press is a natural next step in this journey. Frankly, it’s also one of the easiest things you can do. Read on as I break down building your own press using simple tools and for little money.
How to build a 1-color DIY screen printing press
Before you get started, make sure you have the tools needed for this project.
*Thanks to everyone’s feedback. I’ve made things even simpler by using common tools that most already have in your toolshed. Even if you don’t, it’s fairly easy to get*
Mandatory tools:
- A sturdy/stable work table that you don’t mind trashing 🙂
- 2 pieces of wood – cut to these dimensions (a little bigger or smaller is fine)
a) For the LEDGE – 2 x 15 x 2 (inches)
b) For the PLATEN – 12 x 18 x 1 (inches) - Clamps or mini C-Clamps
- A pair of heavy duty jiffy hinges
- One hammer
- Power drill (if you don’t have a drill, you can create the holes using the hammer and nail)
- Some all-purpose woodworking screws
- One screwdriver
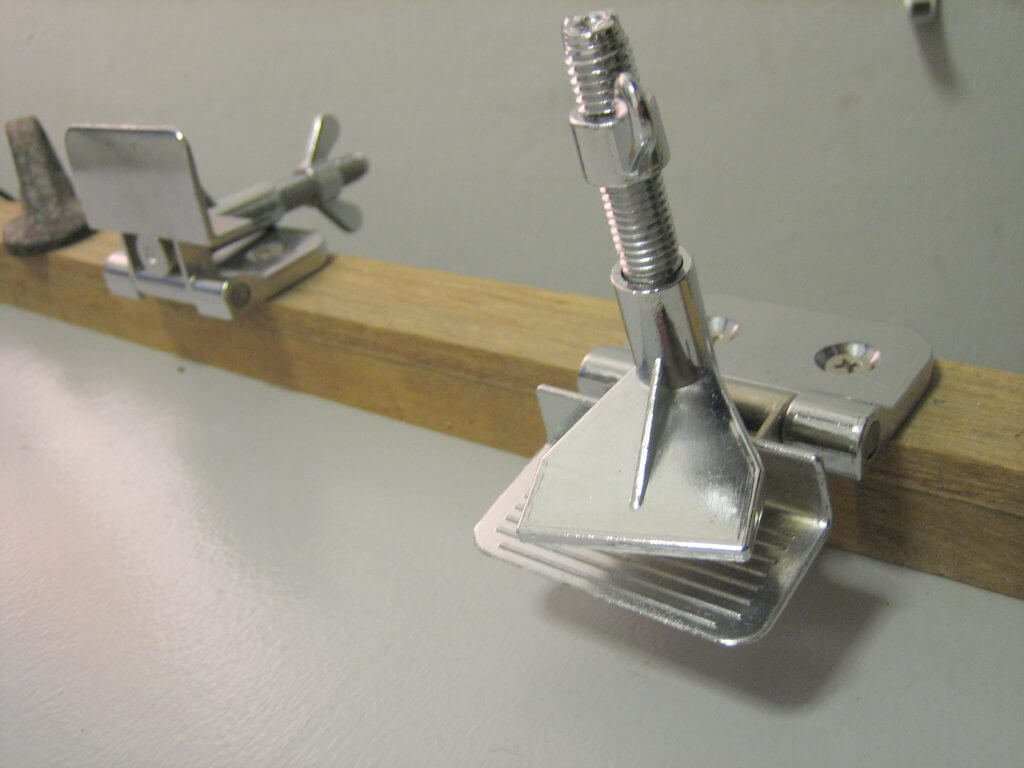
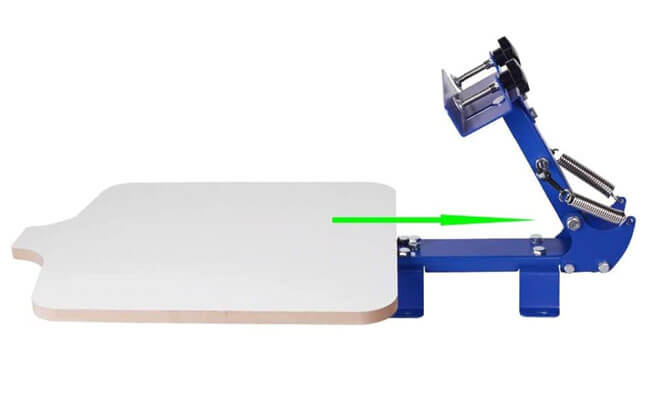
Now that you have everything you need, here’s a picture of what you’re trying to achieve.
–

Putting your press together
Step 1: Creating the base
Grab the two pieces of wood – one for the “Ledge” and the other for the “Platen”.
The “ledge” is where your clamps will sit, while the “platen” is where you’ll be placing your t-shirt.
The screen frame that I’m using is 12” x 16”. So depending on your screen size, the length of the ”ledge” must accommodate your screen.
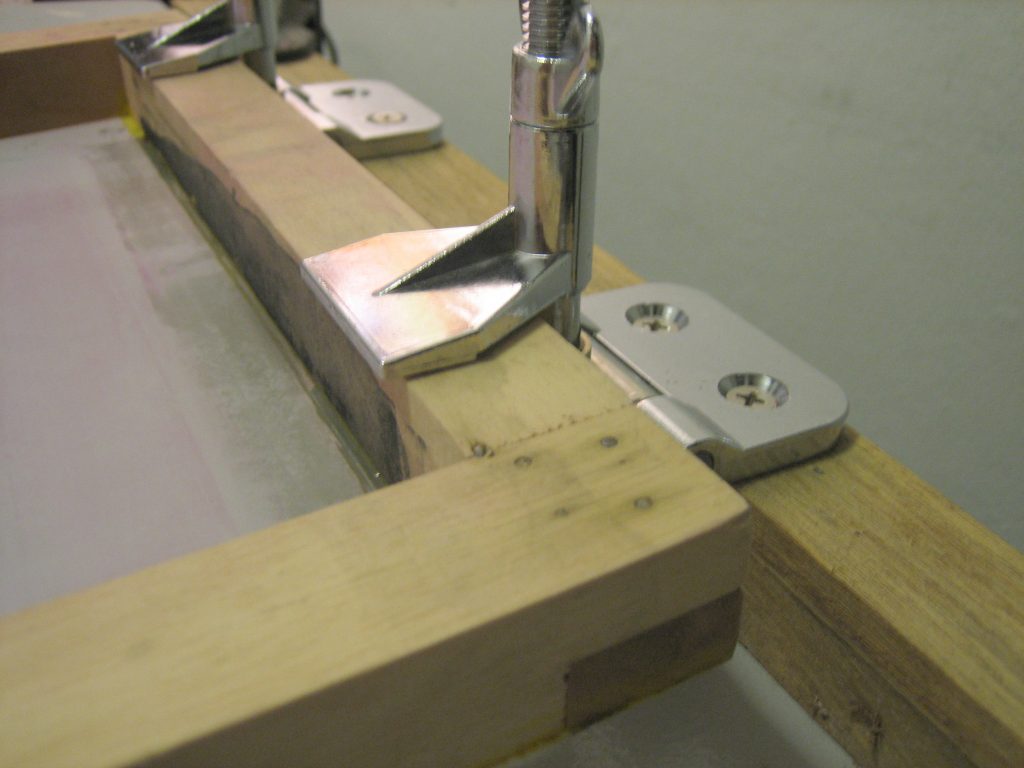
Step 2: Frame holders
I’m using these Speedball jiffy hinges below. They have a total of four screw holes. Drill the holes into the wooden “ledge” and screwed them in tight.
*If you don’t have a power drill, hammer the screws into each hole about 1/8th into the ledge. Then continue on by screwing them in.
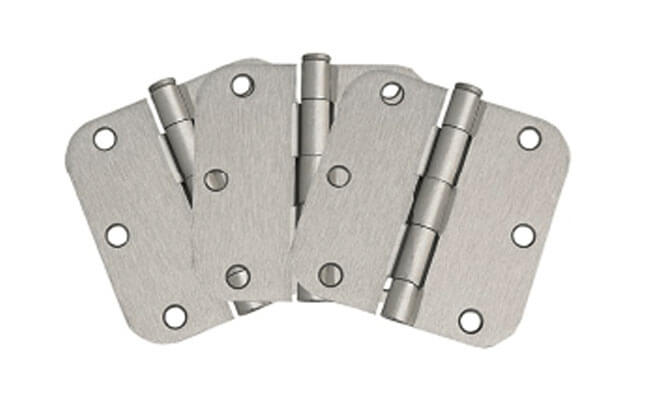
Alternatively, you can use door hinges like the one below, but that means having to drill holes into your screen.
Not conducive if you’re using metal/aluminum frames.
Step 3: Tightening things
Place the “ledge” to the back of your work table and clamp it down tightly using the G-Clamps.
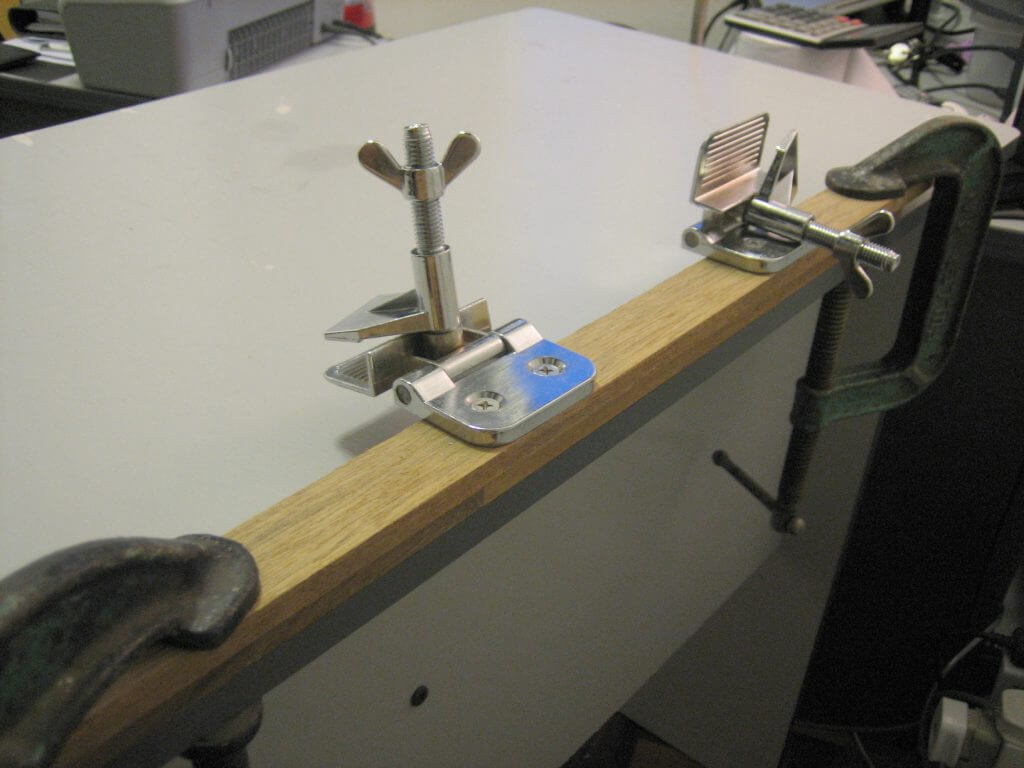
As an alternative, you can also use some heavy duty industrial super sized monster nails to hold down the “ledge” piece.
Step 4: Adjusting everything
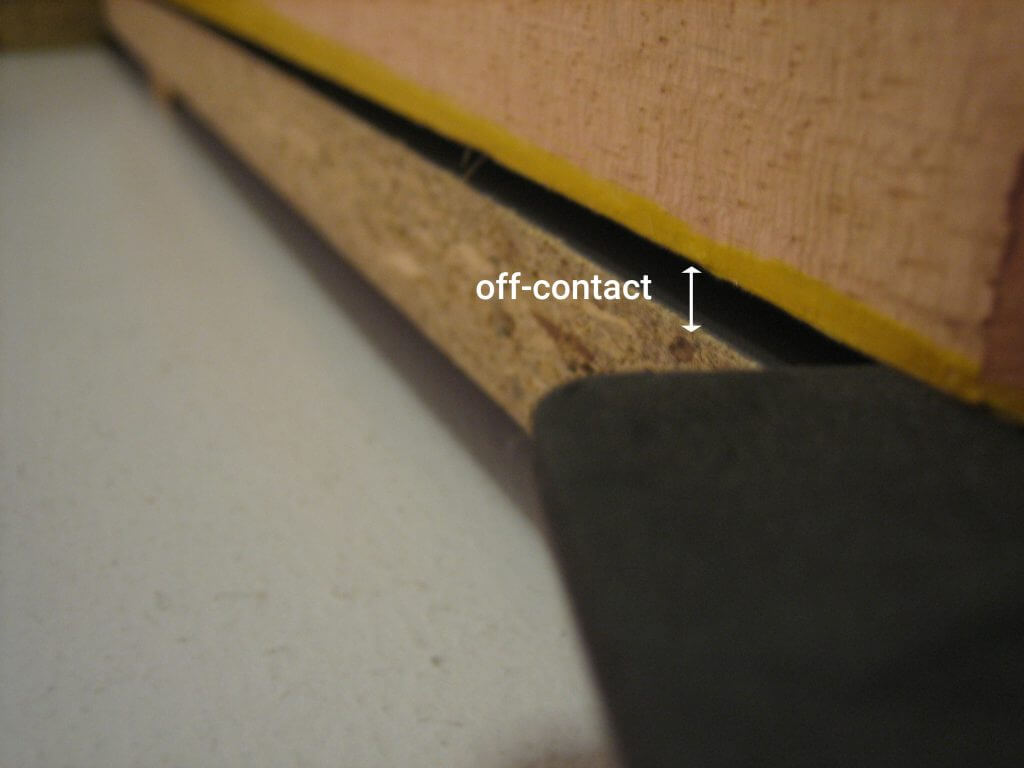
Once this is done, insert your screen and adjust accordingly.
–
Make sure the screen is aligned with the platen.
Also, don’t forget to add a small gap between the frame and platen. This gap is called “off contact“. If you haven’t heard of it before, read my earlier post about why it’s important to have it especially if you’re printing t-shirts.
Troubleshooting and experiments
Congratulations on building your first 1-color DIY screen printing press!
Obviously there will be some differences but I hope you guys have gotten the idea. Feel free to remove and replace any of the components you see here today and let me know what works better for you.
If you’ve successfully built your press, consider checking out my guide where I show you how to build a 4-color screen printing press instead!
3 Best beginner screen printing press kits under $150
If you don’t have the necessary skills to build your own press, don’t worry, not all of us are gifted handymen/women and that’s okay! Check out my top picks for a budget screen printing press that won’t break the bank!
#1. Techtongda 1 Color 1 Station Screen Printing Press with Removable Pallet
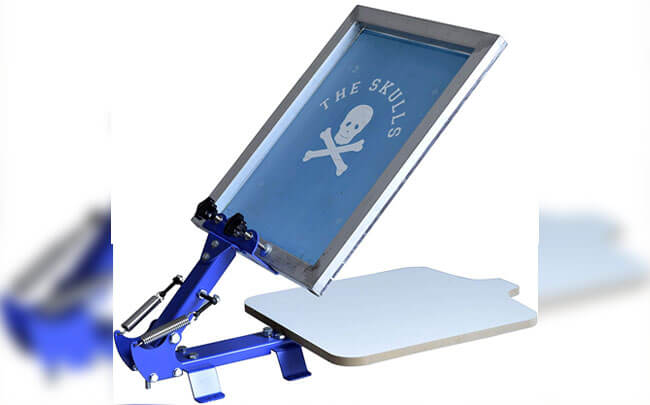
Made with stainless steel, zinc and nickel plating, this heavy-duty screen printing machine is easy to clean and can withstand years of use. The frame comes in 22″x18″ with a max screen thickness of 2 inches.
One of the main features of this press includes an adjustable (back and forth) pallet and clamp. Additionally, there are two springs used to adjust tension and keep the screen frame balance. This press also comes with brackets for you to fix the platen onto the pallet for stability.
Check Amazon for latest pricing
#2. VEVOR 1-Color, 1-Station 22”x18” T-Shirt Screen Printing Press
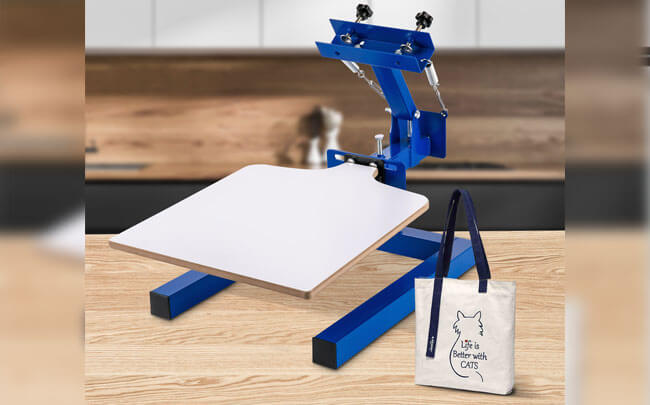
This 1 color 1 station screen printing press from Vevor is a full metal structure with advanced electrostatic spraying technology. This sturdy and portable press is designed to be mobile-friendly, easy to clean, rust-proof, and can withstand years of use.
It comes with an adjustable clamp and pallet, plus two thickened springs, which can adjust the spring tension for screen frames of different weights to maintain balance and stability.
Check Vevor for latest pricing
#3 INTBUYING 1-Color 1-Station Manual Screen Printing Press
 Similar to Techtonga, this screen printing press is also required to be fixed on the table. It’s a great entry level press suitable for beginners that’s made with professional grade materials.
The pallet of this printing machine can be moved back and forth, according to different thickness. Additionally, it comes with two springs to adjust the tension to suit the different weight and keep the screen frame balance.
Check Amazon for latest pricing
Wrap up
So there you go! If you are currently learning screen printing and want to get better, I really do recommend getting a screen printing press to help you. You can either build it yourself or buy one but either way, it’s going to rapidly bring down the learning curve! Good luck!

Thanks for the plans!
Do you connect the platen to the ledge? or just align them next to each other?
Hi, the platen needs to be connected to the ledge. Use a G-clamp so the platen doesn’t move around while you are printing.