Have you noticed how heat press printing has become so popular in recent years? Well, it’s not just a trend. The global heat transfer paper market is worth $580 million in 2022, and is expected to grow to a staggering $872 million in the next 10 years.
One reason for growth is the rise of DIY movements around the globe. More and more folks are creating their own products and starting up small creative businesses as the demand for customization and one-of-a-kind products increase.
Obviously the internet has allowed for this boom to take place, too. With marketplaces like Etsy and Redbubble, the ability to print t-shirts using a heat press and selling your wares is 50x easier these days.
But an even more prevalent reason is the advancement of the heat press machine. These giant irons have evolved so much in the past decade making it a lot more accessible for the masses to take up garment decoration.
Not only are they equipped with amazing features that increase your productivity, but their cost-effectiveness makes it a great option for small business owners and entrepreneurs.
It’s become such a versatile piece of equipment that allows you to print things other than apparel like balls, leather goods, and even shoes.
But even with the given power, not many of us know how to use the heat press’ potential to its full extent.
Today, I’m going to talk about how else you can use a heat press machine. We’ll also discuss the pros and cons of each method and what you need to get started to achieve the next level of heat press sorcery.
6 methods to print t-shirts using a heat press machine
Flex, Flock and Foil
Heat transfers have come a long way. From the Iron-on transfers I used to get at my local crafts store, to what we now have in the market is astonishing. I’m sure some of you are still fidgeting around in the world iron-ons, but for those who have evolved and advanced into commercial grade heat transfer papers or even HTV (heat transfer vinyl), I would like to introduce a few others.
Some may have come across the terms flex, flock and foil, but what are they exactly?
Flex

When you see someone wearing a basketball or football jersey with those huge numbers printed on them, that is Flex printing in action. It is a type of heat transfer vinyl that is stretchable and flexible.
To produce this print along with a heat press, a design is created using a design software. Flex vinyl is fed into a cutter and said image is then cut to shape. The vinyl is then applied and transferred to the fabric using a heat press. Adhesive on the back of the vinyl is heat-activated, causing it to bond with the t-shirt. A carrier sheet is then removed, leaving the Flex material on the substrate.
Flex heat transfer vinyl is often used on athletic wear like sports jackets, performance fabrics like running apparel, activewear, and other items that require a high degree of flexibility and stretchability like headbands.
The designs printed using flex vinyl are typically bold, often blockish, that need to be durable and long-lasting, and can withstand repeated stretches and movements with minimal cracking or peeling.
Flock
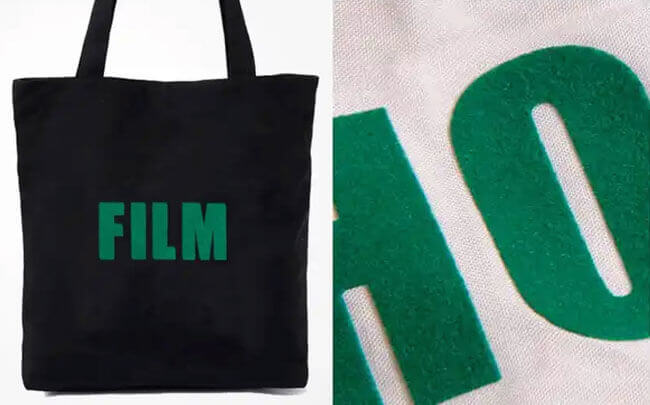
Ever seen some t-shirts with a smooth velvety texture printed on it? Almost like a piece of suede sofa has been cut out and pressed onto your garment? Well that’s what you call Flock.
It’s a type of almost-felt-like, fuzzy (or furry) vinyl transfer that is the result of applying heat and pressure from a heat press which causes the fibers in the vinyl to ‘flock’ up.
Because of its soft and raised texture, Flock printing is often used for creating unique designs such as team logos or lettering. You’ll see them most on activewear like jerseys and hoodies or on other clothing materials like jeans and aprons. Flock printing also makes items like bags, caps, aprons and more stand out.
The process of producing and applying Flock is the same as Flex vinyl, starting with a design and ending with a heat press. You’ll also be glad to know that it’s the same with the next item on our list.
Foil
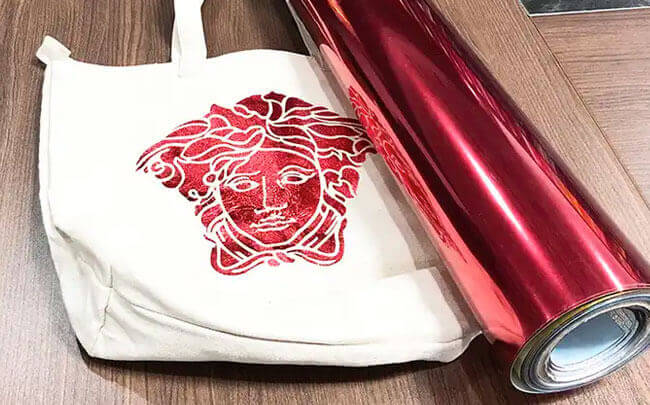
Foil printing has always been my favorite of all three. It’s a thin metal layer of heat transfer vinyl that is used to print metallic designs and elements to t-shirts and other substrates. Typically, you will see Foil printing on fashion forward type clothing like t-shirts, tank tops, and jeans.
Limitations of Flex, Foil, and Flock vinyl
As awesome as flex, foil, and flock vinyl are for unique printing that is both fast and easy, they are only fitting in certain situations.
All three types of vinyl (and to an extent, vinyl in general) do not work well if you have a multicolored design that is complex or requires fine details.
Since each layer of vinyl is a single color, piecing multiple colors together will not only be time consuming, but isn’t cost effective at all. This becomes apparent especially so in large scale productions. With the amount of materials required, there are other printing methods that are more suitable like screen printing.
Additionally, you are limited in the number of colors with heat transfer vinyl. Since there isn’t a mixing process like what can be done with ink, whatever designs you create will need to follow the colors that are available.
Should you try it out?
Short answer, definitely! If you already own a heat press and you’re doing heat transfers, adding flex, foil, flock or all three is a natural next step. There are some incredible easy weeding flex and foil vinyls that will eliminate the need for a vinyl cutter or plotter so try them out next!
Plastisol transfers
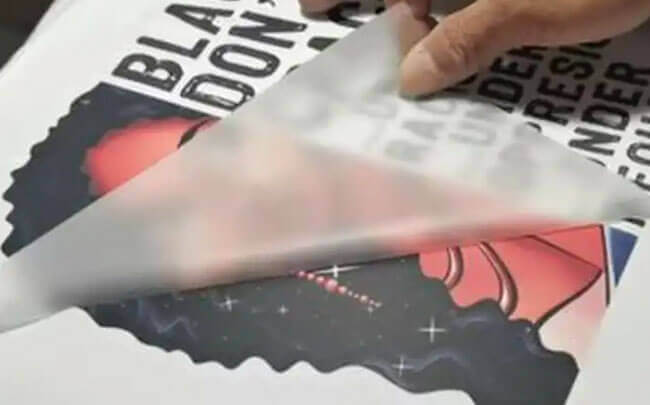
Plastisol heat transfers uses plastisol ink, a special type of PVC-based ink, for printing on fabric. The design is screen printed onto a special release paper using plastisol ink, of which is later transferred to the fabric using a heat press. Once it is heated to a certain temperature, plastisol ink will ‘cure’ and become solidified. This heat bonds it to the fabric.
Plastisol transfers are widely used on t-shirts and other types of apparel. They are known for their bright and vivid colors, durability, and ability to produce a wide range of designs.
One of the benefits of plastisol transfers is the ability to print them up in batches, store them and only use them when needed, say when a customer orders the design. This works especially well with standardized prints like numbers, logos and names.
However, it does have some limitations. Similar to HTVs, plastisol transfers are more suited for small-scale and short-run projects. It can also get quite pricey when doing big batches, compared to screen printing. This type of print method is especially great for testing new designs or color schemes.
Should you try it out?
Absolutely! The process of making plastisol transfer is relatively simple, especially for those who are knowledgeable or are already doing screen printing. I wrote an in depth article about everything you need to know about plastisol transfers, so make sure to check that out.
A simpler alternative is to get them custom made for you. This eliminates the screen printing process entirely, yet retains its benefits. IMO, plastisol transfers are like the love child of screen printing and heat pressing.
Heat Press Patches
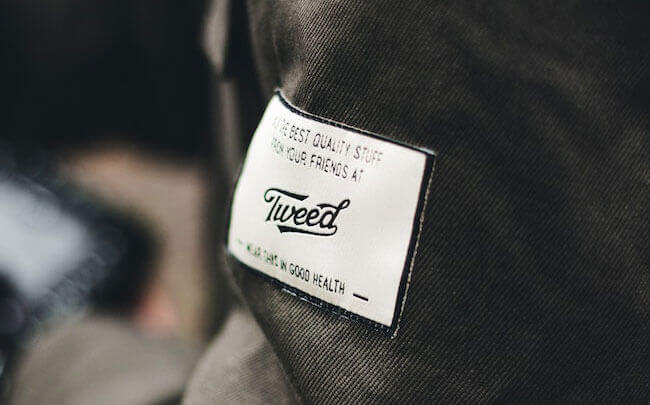
Patches come in different shapes and sizes and can be made from a variety of materials. The most common ones are embroidery, leather, and synthetic materials like rubber or silicone. Even with just these three and its combination, the possibilities are endless for you.
Aside from regular t-shirts and hoodies, patches are usually seen on caps, bags, and jackets given their durable nature.
They are also used for creating limited edition designs or for marketing purposes such as logos, branding, and custom designs for individual customers, teams, and organizations. I especially like patches because they seem to add a certain level of premium-ness to a design if done correctly.
Patches come with an adhesive backing and are applied to the fabric using a heat press. This combination of heat and pressure allows it to adhere to the fabric or substrate.
Should you try it out?
Definitely! Custom patches are relatively cheap these days and like I mentioned, the possibilities are endless. Depending on the intricacies of your design, a patch may cost as low as $0.10 per piece or less. For businesses, adding patches to your service will definitely increase the overall perceived value of your product. What’s not to like?
Rhinestones
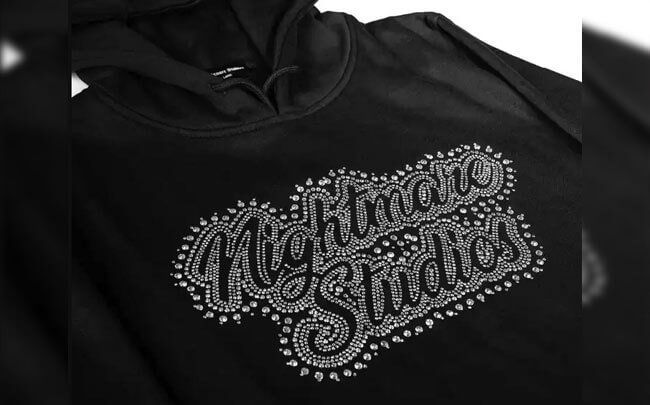
Whenever you see small, shiny, glass or acrylic stones on clothes and other materials, these are called Rhinestones.
Similar to patches, rhinestones add uniqueness to clothes and other items. Because of it’s sparkly nature, these stones will often be used to add some bling and elegance, especially to girly, women’s wear, and fashion items like handbags and belts.
The process to apply these small, shiny trinkets is similar to the methods I’ve written above – design, set, and press onto your preferred fabric using a heat press.
Designs made with rhinestones come with an adhesive backing that is heat sensitive along with a carrier sheet. Once the adhesive melts, these glassy, acrylic stones immediately bond to the fabric.
Rhinestones are commonly used on clothing but I’ve also seen a lot more people pressing it onto paper and card stock these days.
Should you try it out?
Creating your own designs out of rhinestones is a relatively simple process. However, it can get extremely time consuming as you’ll have to lay out each stone one at a time. There are templates available that can guide you to help speed things up, but this only works for small batches and short runs.
The alternative would be to purchase ready-made or stock designs. Or have your designs custom-made accordingly. If you are just getting started with rhinestones, give stock designs a go! Pro World has some pretty eye-catching and affordable rhinestone packs for light and dark fabrics, check them out!
Sublimation
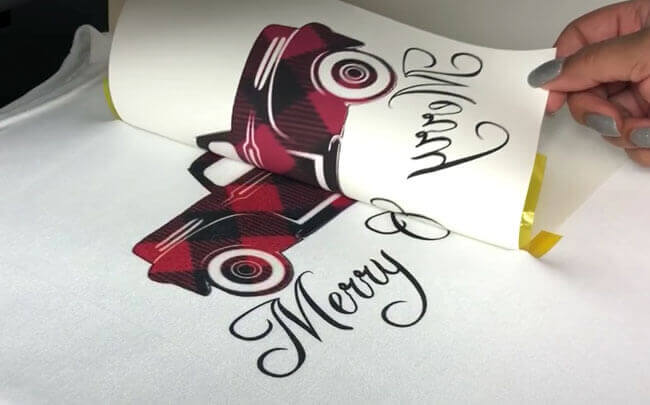
Possibly the most versatile of all methods, sublimation heat press printing is widely used for customizing a variety of things from apparel to metal, polymer to hard plastics, ceramic to even glass.
Often used for clothing and mugs, the sublimation process, in my humble opinion, is the coolest mix between science and art.
When it comes to textile and apparel printing, sublimation ink is used to print designs onto a special transfer paper. A heat press is then used to heat-activate the ink, causing it to ‘sublimate’ or change forms – from its original liquid state into a gas state. With applied pressure from the heat press, a long lasting bond is created with the fibers of the material. Pretty sweet stuff!
However, as cool as it is, sublimation is not perfect and will require some tweaking based on what you’re printing on. For example, items will need to be specially coated to allow the sublimation ink to adhere to. For apparel, polyester fabrics work best.
Furthermore, since sublimation is a bit more time consuming, it is not the most practical for large orders. Also, depending on what you’re printing on, there may be size limitations as well. So if you’re trying to print something really big, you might have to split the image into multiple pieces.
Should you try it out?
If you want a versatile method that can be used on a bunch of items that has the same quality of screen printing without the hassle, then definitely get yourself up to speed with sublimation printing.
Along with your heat press, you’ll need to invest in a sublimation printer, special inks, and paper to get started. You’ll also need to identify what you’ll be printing on as these items need to be specially coated or treated.
I suggest printing on light colored polyester t-shirts to get your feet wet. Once you get the hang of things you can graduate to other substrates like ceramic mugs, phone cases, mouse pads and even keychains.
Direct-to-film (DTF)
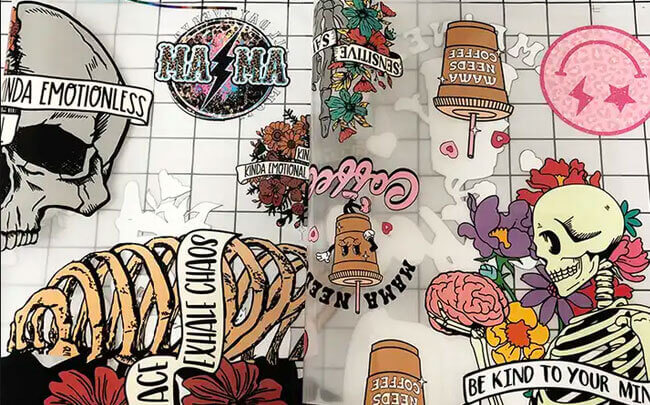
The latest print method that’s taken the market by storm. The DTF application process is similar to other methods on this list, but the output and overall production and utility far exceeds them all in my opinion.
In DTF printing, a special printer is used to print designs on a transfer paper. While the ink is still wet, the paper goes through a coating phase. A special powder is dispersed onto the transfer to gel with the wet ink. Once dried, the design remains on the transfer film until it is ready to be pressed.
In my opinion, the DTF method grabs the best of every print method available and combines them into one. Its application to any garment is a snap, and the result is a soft hand equal to the output of screen printing.
It can be done on any fabric, including light or dark t-shirts, performance apparel, 100% cotton, or polyester blends. Designs can be printed on demand, and in full color unlike vinyl. There is no need for weeding, making the process more efficient and faster.
Should you try it out?
100% yes! If you’re going to invest time, money, and effort into something, make it DTF printing. Not only does it produce phenomenal output, it’s a great option for small runs and large-scale projects.
If you don’t want to spend money on a DTF printer and buying materials, you can start by ordering transfers from DTF custom shops for as low as $0.50 per design.
What else can you use a heat press for?
Apart from the methods I’ve listed above, you can also use a heat press to flash cure or cure ink in the screen printing or Direct-to-garment (DTG) printing process.
Keep in mind that a dryer is usually used to cure but a heat press will also work to heat set the ink to the fibers, creating a longer lasting print.
Time and pressure may vary depending on the type of ink and fabric being used so make sure to check these two elements beforehand.
So there you have it – 6 cool ways to print t-shirt using a heat press! If you are thinking about pursuing this incredible journey and you’re considering purchasing a heat press, make sure to check out my other posts on what to look for when searching for your ideal heat press. Start with this post first.
