
When working with multiple colors in graphic design, the term that gets thrown around a lot is ‘crosshairs’. When it comes to screenprinting, you’ll hear the same concept being expressed as ‘screenprinting registration’.
In this post, I get straight into the details of what it is, the importance of proper setup and how it affects your prints. Read on.
Screenprinting registration, simplified.
Ever tried printing a design that ended up looking like you’ll need a pair of 3D glasses to see it correctly?
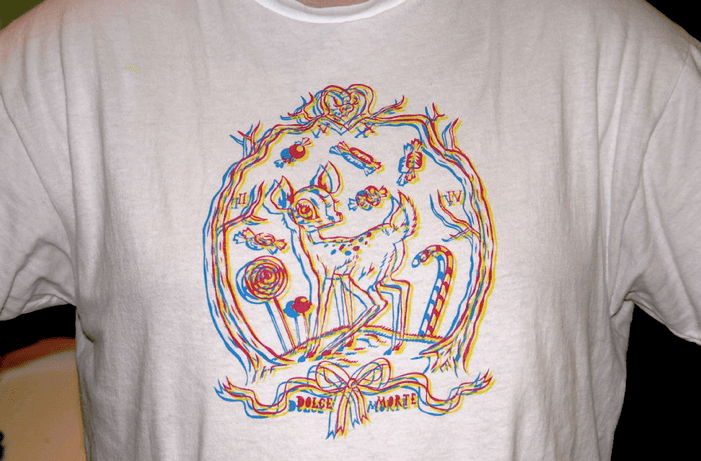
The image above demonstrates an example of what bad registration is – multiple colors that WERE NOT lined up correctly resulting in a bad print.
“But thank God this was just a test print!”
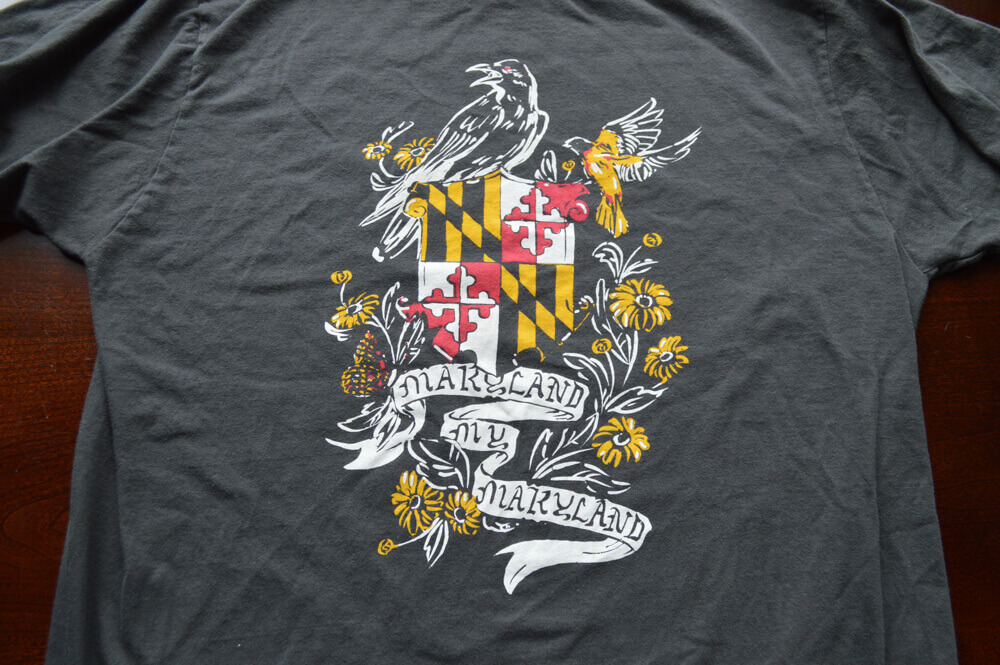
On the other hand, the image below is an example of good and tight registration – notice how many colors there are and how they’re all properly aligned producing a sick print.
This brings us to the big question; what exactly does registration mean?
In screen printing, registration simply describes the process of aligning your artwork’s multiple screens to produce a multi-colored print.
From the picture above, it is obvious that good registration ensures your work doesn’t end up as a bad t-shirt meme on the internet.
When properly done, registration can take your print to the next level and place you a step ahead of others in the game. On the other hand, tiny miscalculations in your alignment can ruin the entire outlook of your print.
Setting up the simplest multi-color registration system
For most of you that don’t have a few hundred bucks to buy a micro registration or joystick system, the most popular option is the DIY method.
If done carefully, and by this I mean triple checking your work as you progress, can yield near perfect results even if you’re just a beginner.
TIP: If this is your first attempt at multi registration, start with a 2-color image for practice. More than that, and you’ll be killing your motivation when things go south!
With that out of the way, let’s begin!
In order to get the results you want (and to minimize troubleshooting later), begin by correctly lining up your press, film positive and screen together BEFORE the going into the exposure room.
This will ensure your artwork is line up when it’s attached to your press for printing.
Here’s how I set things up:
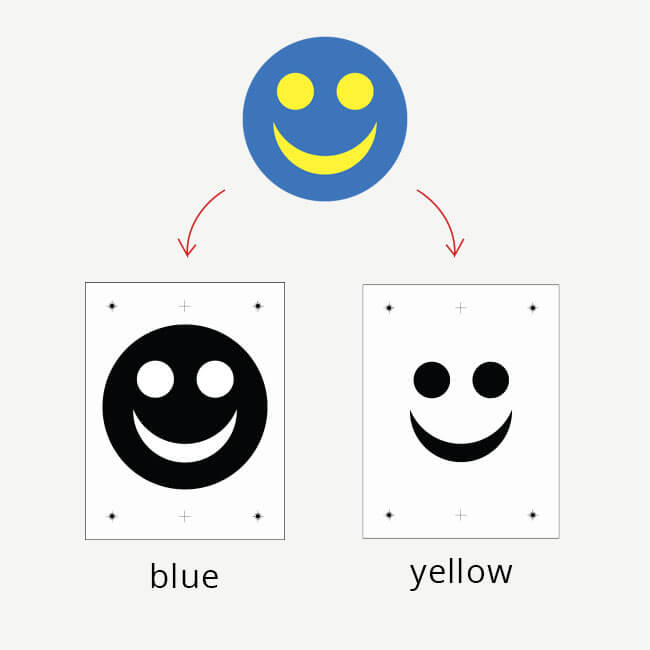
- Let’s say I wanted to print this two color image of Mr.Smiley on a white t-shirt.

2) What I need are two separate screens. One for each color – blue and yellow.
3) To prep my artwork, I use Adobe Photoshop. Another good software is Corel Draw and more recently, Canva.
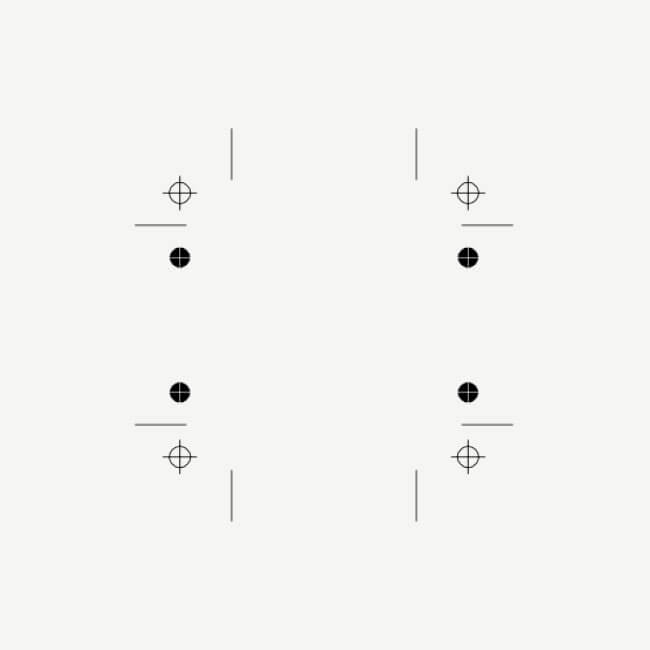
Whichever you choose, make sure to include either “crosshairs”, “registration marks” or “crop marks” before printing out your film positive so it acts as a marker to help you line things up evenly.
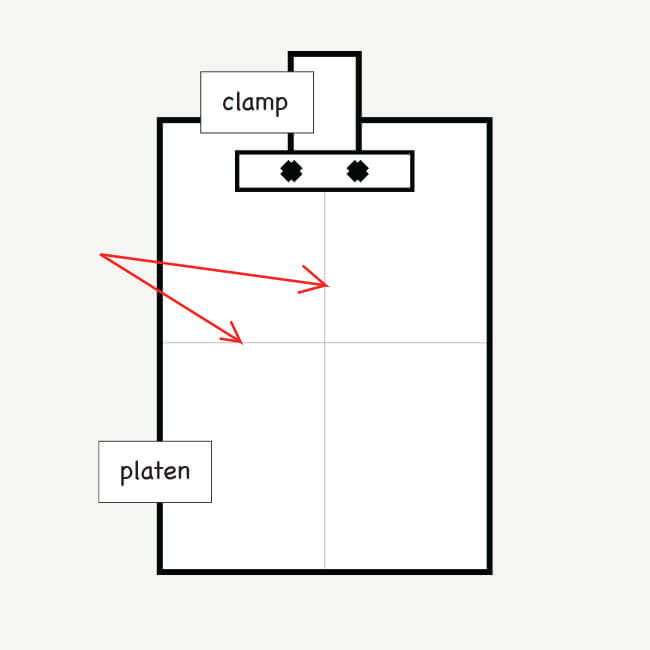
4) Next, go over to your screenprinting press. If you don’t already have some form of grid drawn on the platen, do so now. This will help with accuracy.
For a basic setup, I draw a line down the middle and across. Do not eyeball this, use a ruler or Tee Square to measure the centers evenly.
Once you get a hang of things, you’ll figure out a grid system or template that will suit your needs later on.
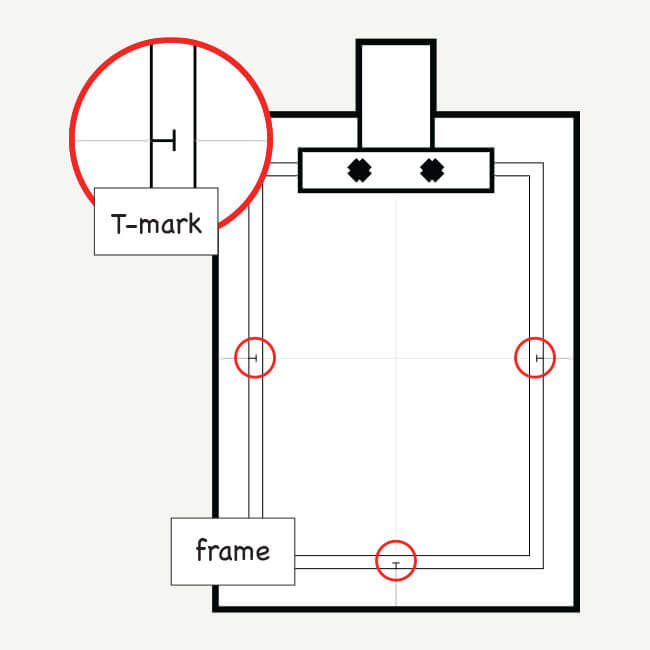
5) Now to line up your screen on your press.
On each of my frames, I t-marked the sides to help me align it with the platen.
6) Place your main film positive on the screen and tape it.
Use the crosshairs to line everything together and secure everything using some clear tape.
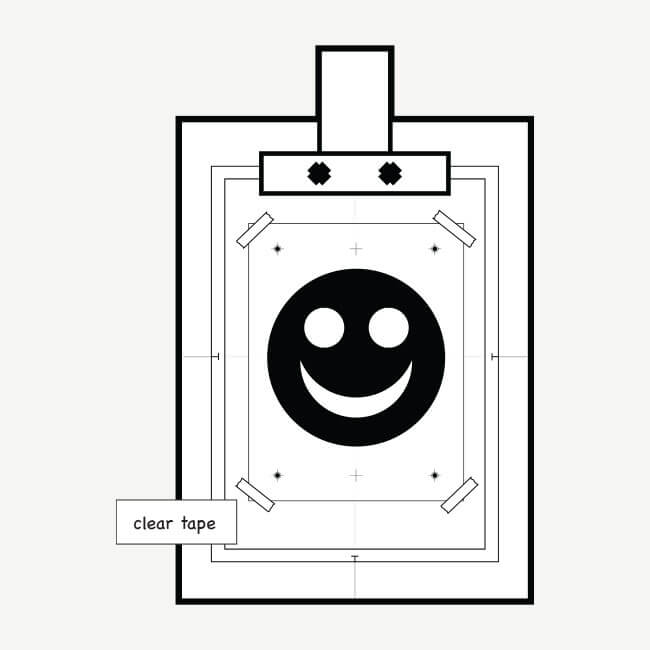
7) You can partially secure the screen with the clamping system you while doing the necessary adjustments.
Once you’ve triple checked everything, go ahead and tighten the clamps. Repeat this process with the second screen.
I like to swap out the frames and fit it back in to see if things still line up.
Once you’re satisfied with registration, then you can start exposing the screens.
Just make sure the film positive stays as-is during exposure.
If you’ve done everything accordingly to this tutorial, you’ll be smooth sailing all the way.
After exposure:
Now that your screens are exposed, re-aligned them to your press. Follow the T-markings on the frame to line them up accordingly again.
Next, apply some ink on the screen and do a test print on a piece of fabric or test pellon before you begin production.
Do the same for the second screen. That’s it guys! Let me know if the comments if you’ve successfully register and print!
Artwork separation and Registration marks
For those of you who are still confused about artwork separation and adding crosshairs in Photoshop, check out the video below by tshirtchick.
She gives a good step-by-step explanation.
Other ways of handling registration
If you’ve got some cash to spare, I would suggest investing in a pre-registration template.
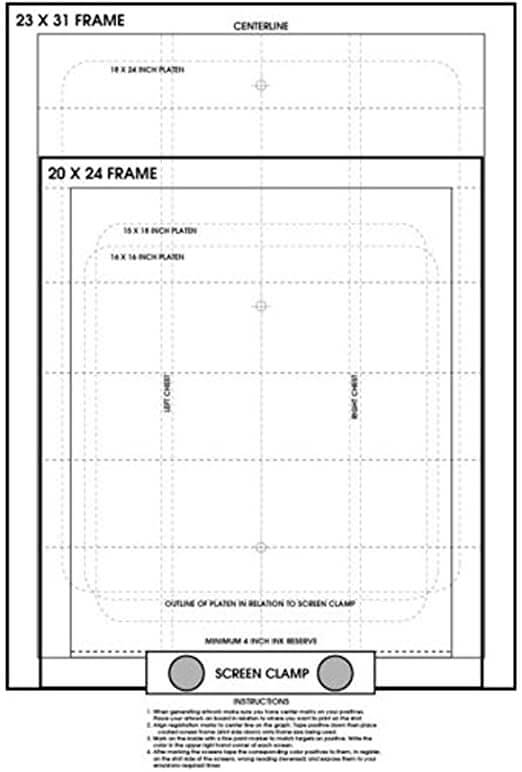
This will definitely take your screen registration to the next level and give you better accuracy overall.
These templates come marked with crosshairs and some come with standard measurements for popular frame sizes.
These are fairly easy to use, especially now that you have the basic knowledge of lining things up.
- First, locate the center registration points on the film.
- Place the artwork against the template ensuring that the center registration point matches the center grid lines. You can also tape this template to your platen.
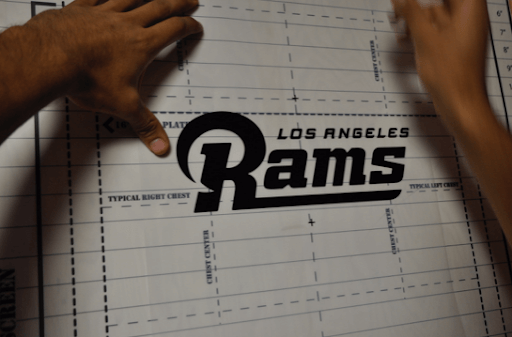
- Next, line up your screen to fit into the outline of the template size
- Tape down the film on the template with the right side facing up.
- Once you have the film taped on the screen, head over to your exposure unit and be on your merry way. Simple no?

If you’re starting out and need a DIY exposure unit, be sure to check out my tutorial on building one for less than $30.
If you need a crash course on screen printing at home, check out my free tutorial. Hope you guys enjoyed this breakdown on screenprinting registration, let me know in the comments if you have any questions.
